
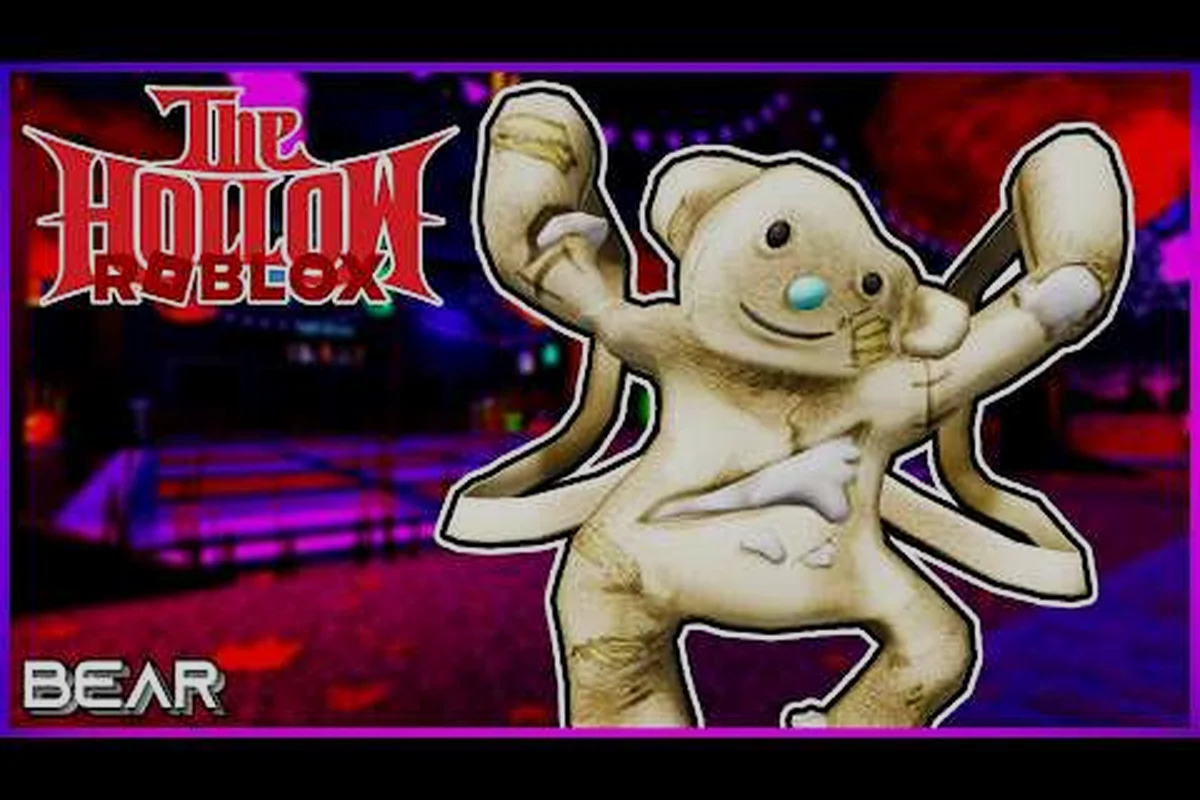
How to play as the Bear in BEAR Alpha is the central skill for the Monstrosity role: you become the 1-versus-all hunter that chases every survivor in the lobby, and this guide turns that role into a repeatable routine. It covers the Bear's core objectives, speed control, jumps, abilities, and hunt tactics, so each round's pressure becomes a planned pursuit instead of a wasted chase.
Bear Alpha Monstrosity Guide: Role and Core Objectives
Knowing how to play as bear in BEAR is essential because the bear is not simply a larger version of the clerk. It is a 1-versus-all monstrosity role built around speed, momentum, pursuit, and surprise pressure. The official BEAR game page on Roblox identifies the experience as a Survival and 1-versus-all game with 10 players per server, which explains why route selection and target isolation matter as much as raw attacks.
The bear’s job is to survive long enough, identify promising survivors, and create repeated chase opportunities. A direct pursuit may work against a stationary target, but constant pressure causes survivors to scatter, hide, or cooperate. Better bear alpha bear gameplay treats the lobby as a dynamic puzzle: pressure one area, observe reactions, then select a route that catches survivors away from their group.
| Bear objective | Why it matters | Practical result |
|---|---|---|
| Preserve speed | Large size can be threatening, but closing distance is the bear’s real advantage | More completed catches and fewer wasted pursuits |
| Create fear pressure | Survivors must decide whether to hide, flee, or regroup | Predictable reactions become hunting opportunities |
| Separate the lobby | Grouped survivors protect one another | Isolated targets are easier to catch |
| Extend the hunt | Each chase consumes stamina and time | The bear survives the full round |
| Adapt to routes | Survivors learn common hiding areas | Rotating routes prevents repeated escapes |
Community footage, including Cuits’ bear gameplay video, points toward patrol patterns, lobby splitting, ambush pressure, and closing out rounds as recurring elements of successful play. Those details are player-reported rather than official specifications, but they align with the role’s visible design.
A useful bear alpha monstrosity guide should focus on decisions rather than assumptions. Do not rely on a fixed route, an exact speed value, or an unverified ability cooldown that the current alpha build may not document. Instead, learn the environment, read survivor movement, and practice controlled approaches that preserve your strongest advantages.
What Successful Bear Gameplay Looks Like
Strong bear gameplay has four repeating phases: scan, pressure, pursue, and recover. Scanning identifies noise, silhouettes, or survivors reacting to danger. Pressure pushes one group toward another and creates uncertainty. Pursuit rewards good timing, while recovery restores space for another approach.
Beginners often reverse this order. They rush toward the loudest event, chase for a long time, and then lose momentum when the target disappears. A more effective sequence is to watch first, force movement, choose one target, and close only after the target has separated. This approach makes the bear feel controlled rather than random.
The beginner guide to BEAR is useful for learning the game’s basic round structure, including how your bear’s movement, stamina, and survivability affect each hunt. Once those fundamentals are clear, shift your attention toward the bear-specific priorities in the sections below: use your speed to cut off escape routes, your jump to maintain pressure, and your senses to track survivors without overextending during pursuit. A controlled bear creates fewer openings than a blind charge, because every missed pounce can leave you exposed and reset the hunt.
Bear Alpha Bear Abilities and Movement Control
Bear alpha bear abilities should be treated as tools within a chase plan, not as buttons to press whenever they become available. The most important ability is the one that helps you create a favorable gap, maintain momentum, or prevent a target from escaping around obstacles. Because BEAR remains in alpha and official mechanics are not fully documented, avoid presenting any cooldown or damage value as permanent fact.
The most reliable ability information comes from current gameplay observation. Test one action at a time in a low-risk area, note whether it changes your movement or attack range, and repeat the test in a different route. This creates a personal Ability Verification Loop instead of relying on outdated community advice.
| Ability test | What to observe | Practical use |
|---|---|---|
| Primary attack | Reach, recovery time, and hit response | Finish a target that stops running |
| Charge or burst | Startup, duration, and turning behavior | Close a short gap or cross open ground |
| Jump | Height, landing recovery, and obstacle clearance | Reach ledges, cross hazards, or threaten an exit |
| Heavy attack | Control requirements and interruption risk | Punish a target caught near cover |
| Special move | Availability and interaction with other actions | Finish a round when positioning is ideal |
This Alpha Ability Verification Table records observations rather than unsupported numbers. Keep notes after each match and update them when the developer changes the game. The official page was updated on October 31, 2026, so alpha balance can shift without warning, and any dated guide should be treated as a snapshot.
Build a Simple Ability Routine
A workable routine begins by approaching at normal speed. Players can easily use that approach period to watch the target’s reaction, and the gap is useful. If the survivor runs, use the speed or movement tool to stay behind them without wasting the stronger attack. If the survivor stops, use the basic attack to test the response. Reserve the heavy or special option for a clearly favorable opening.
This sequence reduces unnecessary exposure to the lobby and prevents the bear from appearing predictable. It also makes the chase easier to read: the survivor can see that the bear is already close, so hesitation may offer a short window for a clean catch. The same logic applies to environmental pressure. Chase commitment is valuable only when the exit is under your control.
Read the Recovery Window
Attacking at maximum range is not always the best choice. If the survivor turns a corner, lands a jump, or changes direction, the attack may finish after they have moved. Aim to use strong attacks when the target’s route is constrained by a wall, a gate, or a sudden obstacle. When the route remains open, continuous speed and pursuit pressure may produce a better result.
Community resources such as Munolish’s bear update video can reveal how the bear feels in motion, but treat any stated timings as player testing until confirmed by the developer. Movement can also change during alpha updates, so the bear weakness and strategy overview should be used as a tactical reference rather than a fixed build description.
Bear Alpha Bear Speed: Chasing Without Wasting Momentum
Bear alpha bear speed is most valuable when it converts a short advantage into a completed catch. It is less valuable when used to cross the entire map without purpose. Chasing directly at maximum pace often gives the entire lobby time to watch the event, call attention to you, and cooperate against a predictable threat.
Control speed by separating approach speed from pursuit speed. Approach speed should be moderate because your goal is information. Increase speed only when the target is isolated, already moving toward cover, or close enough that a brief chase is worthwhile. If the target is far away and heading toward a group, let them go and pressure another route.
| Situation | Recommended speed choice | Reason |
|---|---|---|
| Target is hidden | Slow approach | Looking preserves surprise and reduces noise |
| Target is visible and alone | Moderate chase | It tests the target without committing everything |
| Target is close to cover | Full pursuit | The catch window may disappear in seconds |
| Target is running to a group | Controlled pursuit | Speed alone may unite the survivors |
| Lobby is spread out | Medium patrol | You need time to read multiple routes |
The Speed Decision Matrix keeps the bear from treating every sighting as a chase. The key distinction is whether the target is becoming easier or harder to catch. A fast target moving toward a door may still be a good pursuit, while a slower target leading a group of survivors usually is not.
Preserve an Exit Route
The best hunts often begin when the bear is not directly behind the target. Circle slightly so the survivor’s nearest escape sends them across the bear’s path. This technique works best in corridors and open zones with multiple obstacles because it reduces the angles a target can use. It also prevents the bear from becoming a long straight-line runner that can simply be outpaced.
Watch for environmental sound cues and visual reactions. If a hiding survivor changes position when another survivor runs past, that movement may reveal their location. Patience can therefore convert into a faster final chase because you start closer and the target has fewer options.
Player communities frequently describe “splitting the lobby” as effective, but it is better understood as controlled disruption than repeated group attacks. Force survivors to make decisions, expose their position, and leave some of them isolated. The approach creates more openings than a single long pursuit ever could.
Bear Alpha Bear Jump Guide for Elevation and Pressure
The bear alpha bear jump guide is less about flashy traversal and more about controlling where survivors expect you to appear. A jump can cross a gap, reach a ledge, interrupt a climb, or threaten a route that seemed safe. Used without a clear purpose, however, it can waste time and leave the bear vulnerable.
Begin by learning the difference between a quick hop, a committed jump, and a jumping attack if your current build distinguishes them. Do not assume all three exist. Record whether each movement option allows steering after takeoff, because an adjustable jump can close a diagonal gap that a fixed leap cannot. Also note whether landing briefly slows movement, since that affects ambush opportunities.
| Jump situation | Better option | Reason |
|---|---|---|
| Short obstacle with a survivor beyond | Committed jump | The landing position creates pressure |
| Narrow gap with no target | Normal traversal | Speed matters more than height |
| Survivor on an elevated route | Jump or ledge access | Height removes the expected escape |
| Target close in front | Ground attack | A jump can overshoot the catch |
| Open field | Directional chase | Jumping reduces steering control |
This Jump Decision Table focuses on practical outcomes rather than animation. Treat a jump as successful only when it changes the survivor’s available route, cuts off an escape, or repositions you for a ground attack; landing beside a target who can keep running usually spends movement for little gain. For example, jumping toward a survivor on an elevated route can deny the ledge exit, whereas jumping in an open field can reduce your steering and leave the directional chase as the better option. If the build’s jump has no midair adjustment, use it against fixed obstacles rather than diagonal gaps.
Combine Jumps With Hunt Geometry
The strongest jump setups use cover. Start behind an obstacle that blocks the survivor’s view, wait for the target to pass the point where they can clearly see you, and then jump toward their flank. The sudden angle forces a reaction, and a survivor who turns away may expose their back. A landing directly behind them can also cut off the route they planned to use.
Do the same in reverse when guarding a high route. A survivor who believes the lower path is safe may move toward a ledge where your jumping approach threatens them. This creates pressure without requiring you to stand directly beneath the target.
Community examples of jumping and bear movement are best treated as observational guides. The BEAR alpha footage by Cocajola may show different states of the alpha, so compare movement carefully instead of assuming every version behaves identically.
When Not to Jump
Avoid jumping when the target is already close. A horizontal attack may land sooner than a jump, while an airborne attack can miss if the target changes direction. Also do not jump across a wide hazard without another route in mind. The bear’s size makes recovery more costly when a jump ends poorly.
Use a jump to create pressure, not to replace every pursuit step. If the target is far from the bear, speed produces the larger advantage; if the target is close and constrained, a short committed leap can finish the gap. This distinction is especially important in the bear alpha bear jump guide because players often treat jumping as a default movement rather than a situational tool.
Bear Alpha Bear Hunt Strategy: Pressure, Isolation, and Catch Timing
A reliable bear alpha bear hunt strategy revolves around controlling information. Survivors react to danger, and their reaction tells you where they are and how the group is organized. If the lobby remains quiet, increase pressure in one area and listen for movement elsewhere. If survivors bunch together, separate a patrol target from the group before committing to a chase.
Use the following hunt cycle during each round: first assess survivor spacing and the exit layout, then create pressure with controlled bear speed to reveal an isolated route. Avoid committing to a full chase until the target’s path is clear; for example, if a survivor pauses near a corridor while the group retreats through the lobby, that pause may mark a hiding point. Use your bear jump only when a normal closing angle would expose the attack, and reserve heavy actions for a finishing window where the survivor cannot sidestep. After a catch or missed lunge, relocate immediately so the remaining survivors cannot predict your next bear approach.
-
Map the lobby: Identify open zones, corridors, elevated routes, and likely hiding points.
-
Create noise or pressure: Move toward one group to draw attention away from another area.
-
Read the reaction: Watch which survivors move, stop, or redirect.
-
Select one target: Prefer a survivor whose route does not lead back to the group.
-
Close at controlled speed: Build momentum without announcing the entire approach.
-
Adjust to the exit: Attack when open space appears; otherwise use a jump or heavy action.
-
Recover and relocate: After a miss or catch, avoid remaining in the same predictable area.
| Hunt phase | Main objective | Mistake to avoid |
|---|---|---|
| Map | Learn current survivor distribution | Repeating the same patrol blindly |
| Pressure | Force movement and expose routes | Chasing the entire group |
| Select | Find one catchable target | Switching targets mid-pursuit |
| Close | Preserve speed and angle | Rushing across exposed ground |
| Finish | Time the attack to the exit | Attacking where the target can sidestep |
| Recover | Reset for another opportunity | Remaining beside a completed catch |
The Hunt Cycle Table keeps decisions simple during busy rounds. It also gives you measurable checkpoints. Instead of asking whether a round felt successful, ask whether you mapped the lobby, isolated a target, and created at least one clean finishing opportunity.
Use Layers of Pressure
A single pursuit is easier to understand than layered pressure. Start with a distant approach, then use movement speed to remove one safe direction. If the survivor turns toward the group, let them run unless the separation is improving. If they turn toward a dead end, accelerate and finish the catch.
Layer pressure also applies to guarding. Occupy a route long enough that survivors must choose another. The goal is not to remain in one place indefinitely; it is to make each route temporarily costly. A bear who changes patrol direction after a miss can turn a safe hiding spot into a dangerous one.
For broader round knowledge, the BEAR survival guide explains how survivor-side pressure affects the lobby. Use that perspective to map which routes become less reliable hiding choices when several survivors are split across the map. If a survivor uses a dead-end prop, a nearby structure, or the edge of a room to break line of sight, close the exit before they settle behind it. Anticipating these choices lets the bear turn a survivor’s escape route into layered pressure rather than merely chasing them after the chase has already begun.
Decide When to Disengage
Disengaging is not a failure. It is useful when the target has room to escape, the group is regrouping, or your stamina is depleted. Continuing a hopeless chase can surrender initiative to every survivor in the area. A clean retreat followed by a different route creates two new threats and often produces a better second attempt.
Community reports describe successful bear players splitting the lobby and closing out rounds, but those outcomes depend on the encounter rather than following one fixed route. The Round Pressure Sequence should be adjusted for map position, server behavior, and survivor skill level: use the bear’s speed and jump to cut off escape paths, pressure isolated survivors before the group can regroup, and preserve momentum when a chase becomes too costly. In a larger lobby, choosing one crowded route may push survivors toward another teammate; in a smaller lobby, constant pressure can expose the bear’s stamina limits.
Bear Alpha Bear Gameplay: Practical Match Routine
Before the round begins, establish a short plan rather than trying to memorize every route. Choose one primary area, one secondary pressure point, and one fallback route. During the round, move between those three functions. This reduces wasted travel and makes your behavior less predictable without requiring a fixed camping location.
| Match phase | Action | Reason |
|---|---|---|
| Opening seconds | Observe the initial spread | Early movement reveals useful patterns |
| Early round | Patrol between primary and secondary areas | You gain information without overcommitting |
| Mid-round | Pressure a group and isolate one target | Survivors become easier to catch as the round progresses |
| Late round | Cover likely regrouping points | Remaining survivors need safer routes |
| After a miss | Rotate immediately | A new angle breaks escape momentum |
The Pre-Match Match Plan is intentionally modest because the map and lobby can change. Use it as a framework, not a promise of exact outcomes. A player who knows where to go next after a miss will usually create better opportunities than one who remains beside the failed chase.
Review One Detail After Every Round
Track one thing that improved and one thing that failed. “I caught more targets” is useful, but a more actionable note is “I stopped chasing the front runner near the group.” Another example is “I reached the ledge, but my jump did not cover the final gap.” Specific notes turn a bear alpha monstrosity guide into a personal training system.
Community sources can accelerate the learning curve. A general round walkthrough in the BEAR basics guide helps clarify the broader game, while the official game page remains the best source for current server format and project information. Player videos are most useful for visual timing, which is difficult to communicate through text alone.
Match the Difficulty to the Situation
The best strategy against cautious survivors may differ from the best strategy against aggressive runners. Against cautious players, pressure entrances and control obvious hiding routes. Against runners, use angled approaches and jumps to block their fastest lane. Against groups, patrol between groups so a chase does not become a cooperative defense.
| Survivor behavior | Bear response | Primary benefit |
|---|---|---|
| Constantly runs in a straight line | Take an angled route | Forces a direction change |
| Hides when others approach | Guard exits and pressure groups | Reveals the hiding pattern |
| Stays with the group | Split the lobby | Creates isolated targets |
| Jumps over obstacles | Learn landing positions | Turns the obstacle into a trap |
| Uses narrow corridors | Save heavy or jumping attacks | Removes sidestep options |
Keep the Loadout Flexible
An alpha build may offer several approaches, but a simple loadout is easier to execute. Select options that help with mobility, pursuit, or the type of attack you use most. Do not fill every slot with a different damage option if it leaves gaps in speed or control. The BEAR treasure quest guide can help with separate progression goals, but hunting performance depends on consistent movement and positioning rather than completing optional tasks during a round.
The practical takeaway from this bear alpha bear gameplay routine is simple: observe first, pressure selectively, and make every fast movement purposeful. The bear is most effective when survivors feel cornered before the catch, not merely when the bear reaches them first.
Frequently Asked Questions
What is the best way to play the bear in BEAR Alpha?
The best bear approach combines observation, pressure, and selective pursuit. Patrol first to learn where survivors move, force a group to react, then isolate one target whose route does not lead back to safety. Preserve speed until a clean finishing angle appears instead of chasing every visible survivor at maximum pace.
Does the bear need high speed to catch survivors?
Speed helps, but constant maximum-speed movement is not required. Moderate speed supports scouting and controlled pursuit, while full speed is most valuable when a target is close to escaping or becomes briefly isolated. Curved routes, obstacles, and jumps can turn a slower approach into a stronger attack angle.
When should a bear use a jump in BEAR Alpha?
Use a jump when it reaches an elevated route, closes a gap that normal movement cannot safely cross, or removes one of the target’s escape angles. Avoid unnecessary airborne attacks when a survivor is already close, because a grounded strike may connect sooner. Test current jump behavior regularly because alpha updates can alter movement.
Should the bear chase the fastest survivor first?
Not automatically. The fastest runner may lead others toward a group or a safer area, making the chase inefficient. A slightly slower target separated from the group is often easier to catch. Choose targets according to isolation, escape options, and nearby cover rather than apparent speed alone.
What abilities should a new bear prioritize?
Prioritize the abilities that improve Gap Control, movement reliability, and attack recovery. A speed tool helps close short distances, while a controlled jump can block a route or reach elevation. Test each action in a safe area and record its current behavior, because the alpha version may change and community timings may not remain accurate.
Playing BEAR’s bear well comes from disciplined pressure rather than constant aggression. Watch the lobby, separate a target, preserve momentum, and time attacks around the available exit. With repeated testing of movement and abilities, that consistent decision-making becomes the difference between chasing survivors and catching them.