
Choosing the right map in BEAR can determine whether a new player learns the core survival loop or spends most of the round searching for an exit. This bear alpha difficulty guide compares routes, puzzles, threat exposure, and map size so you can start with a manageable challenge.
Bear Alpha Difficulty Guide: What Makes a Map Hard?
Difficulty in BEAR is not a single number attached to a map. A narrow route with several hiding places can be easier than a wide forest with long sightlines, because the real challenge depends on how much information you can gather before making a move.
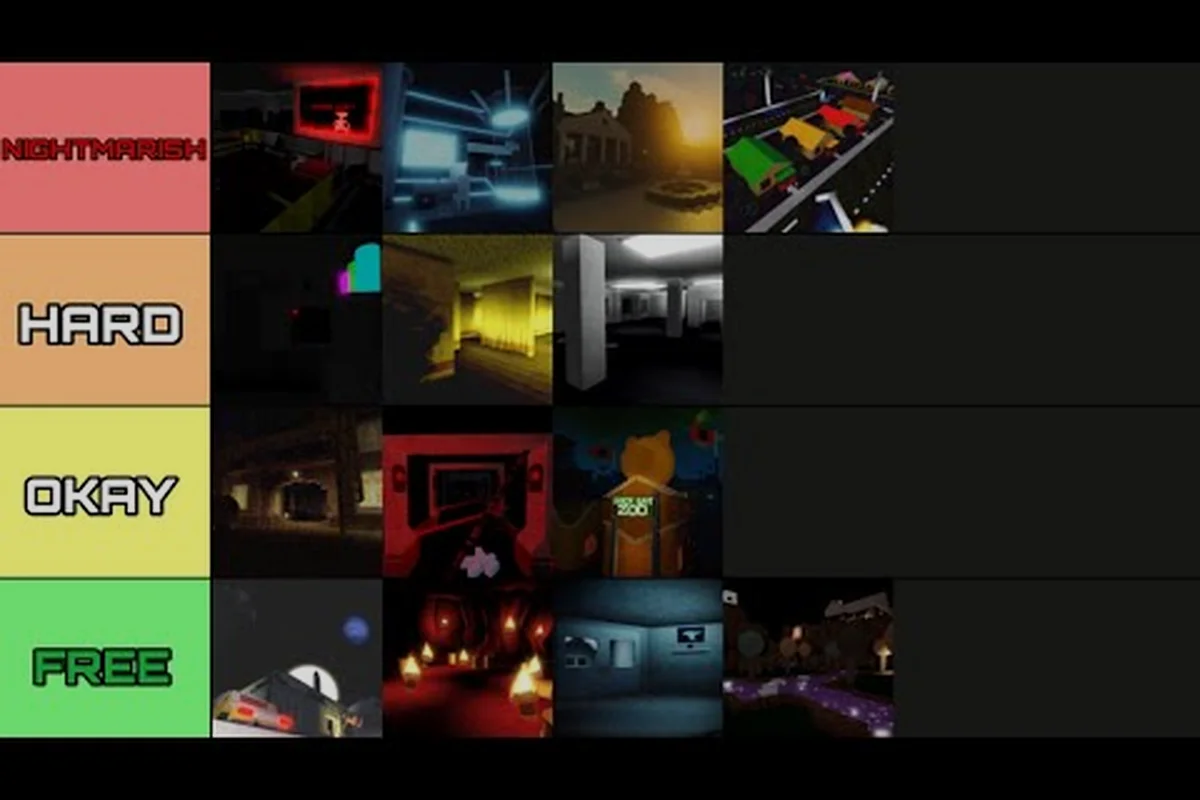
The Map Difficulty Framework used in this guide weighs five practical factors: route length, enemy exposure, objective complexity, escape options, and information quality. Community videos such as EndStoneNinja’s map-difficulty ranking for BEAR Alpha are useful player-reported examples, not an official tier list, so treat their conclusions as guidance rather than fixed rules.
| Difficulty factor | Low-risk sign | High-risk sign | Why it affects survival |
|---|---|---|---|
| Route length | Short, direct path | Long, branching route | Long routes consume time and create more opportunities to be found |
| Enemy exposure | Frequent cover | Long open sightlines | Open ground gives pursuers better tracking opportunities |
| Puzzle complexity | One clear objective | Several unclear steps | Confusing objectives divide attention from nearby threats |
| Escape options | Multiple exits | One narrow exit | A blocked route can turn a chase into a dead end |
| Information quality | Signs, landmarks, safe cues | Sparse or misleading cues | Confusing maps cause wasted movement and mistakes |
Start With the Complete Beginner Loop
Before comparing individual maps, learn the basic survivor routine: locate the objective, collect what is required, watch for movement or sound cues, and leave through a route that does not cross an obvious danger zone. The BEAR beginner guide explains how the initial interface, objectives, and round structure fit together.
A new player should also understand the difference between being pursued and simply being observed. Chasing gives away your direction immediately, while observation may mean someone is waiting near a frequently used path. Staying still is useful only when the nearby environment gives you a reliable hiding option; otherwise, movement can be safer than remaining in one exposed position.
Separate Survivor Difficulty From Bear Difficulty
If you play the Bear role, the same map can feel easier or harder depending on your pathing. Beginner Bear players benefit from maps with fewer branching objectives and recognizable landmarks, because chasing a survivor around confusing loops is much more demanding than patrolling a predictable route.
| Player role | Best early map traits | Most common mistake | Practical objective |
|---|---|---|---|
| Survivor | Short routes, clear landmarks, cover | Spending time searching for an uncertain clue | Complete the objective and extract promptly |
| Bear | Predictable patrol lanes, limited branches | Chasing through several unclear rooms | Preserve distance and cut off exits |
| New survivor | One obvious objective type | Treating every sound as the Bear | Move only after checking nearby cover |
| New Bear | Open spaces, short loops | Rushing without tracking movement | Patrol methodically and use sound cues |
This distinction prevents a common mistake: selecting a map because it looks spacious or impressive when your actual weakness is navigation. A simple forest loop may be more dangerous than a compact compound if the latter lets you memorize every door and corner.
Safest Bear Alpha Maps for New Players
Because BEAR Alpha does not publish an official numerical map tier list, the safest recommendation comes from observable structure rather than an unsupported score. A map is beginner-friendly when a player can form a route, recognize progress, and understand where danger enters the area.
The comparison below uses community gameplay observations and general route logic, so it should be read as a practical Relative Safety Band guide rather than an official ranking. The key variables are route length, landmark visibility, exit access, puzzle complexity, and how often temporary events can disrupt a survivor’s escape plan. For example, a short loop with several exits is easier to learn than a long corridor map with weak visibility cues, even if the latter offers more hiding places. Individual rounds may vary because objectives, teammate behavior, random task locations, and temporary events can alter the safest path.
| Relative safety band | Map structure | Route risk | Puzzle risk | Best use |
|---|---|---|---|---|
| Safest tier | Short loop, strong landmarks, several exits | Low | Low | Learning survivor objectives and testing the Bear |
| Easy tier | Moderate branching, recognizable landmarks | Low to medium | Low to medium | Building confidence after the first successful round |
| Medium tier | Long routes, uneven cover, limited exits | Medium | Medium | Players who already understand escape routes |
| Challenging tier | Dense branching, weak visibility cues | High | Medium to high | Experienced teams using deliberate communication |
| Highest-risk tier | Open sightlines, complex objectives, dead ends | Very high | High | Advanced play with a tested strategy |
Why Short Maps Usually Help
Short maps reduce decision time. A survivor can reach an objective, recognize an objective location, and choose an exit before uncertainty becomes dangerous. This advantage is especially noticeable during early rounds, when players are still learning which sounds indicate danger and whether an open doorway is safe.
Short does not mean easy, however. A compact map can be brutal if it has one exit, poor lighting, or hiding spots beside the objective. The better choice is a short map with multiple escape lanes and cover that can be reached without passing directly through the Bear.
Why Open Maps Can Be Safer
Open terrain looks dangerous because it exposes long distances, but it can also make sound cues and movement easier to read. A skilled survivor may cross a field quickly, while the Bear must commit to a visible pursuit. In contrast, dense forests can hide footsteps, footsteps, or visual tracking that would be obvious in a field.
The safest open map is not an empty field. It should include a Middle-Layer Refuge: a tree cluster, structure, or terrain edge that lets a survivor break sight without entering a dead end. A route with three useful cover zones is usually more manageable than one that asks players to sprint continuously.
Use the Settings Guide Before Committing
Brightness, shadows, and visual clarity can change the apparent difficulty of the same route. The BEAR settings guide explains how mobile and desktop configurations affect visibility and control, which is especially useful if you often lose track of landmarks. Before entering a round, adjust settings so you can clearly distinguish interactable objectives from ordinary scenery. Keep motion effects and interface clutter under control, but do not assume a visual setting change can compensate for a route with poor escape options.
Bear Alpha Route and Threat Comparisons
The safest route is rarely the straight line between spawn and the objective. Choose a route that combines short cover-to-cover advances with enough visibility to hear or spot the Bear before it closes the distance. For example, an alternating-cover route is safer than a direct objective line because it lets you pause, change direction, and use an exit branch when the Bear enters the corridor. Avoid routes that force you to backtrack through the area the Bear has already searched, since that removes space to maneuver and turns a controlled retreat into a dead-end search.
Before committing to a route, compare the map’s threat-level patterns against your available cover, escape options, and noise discipline. An alternating-cover line is usually the safest starting point, but a long looping route can be safer when the shortest path contains a wide exposed gap; the priority is to preserve enough space to reposition without crossing the Bear’s likely entry corridor. Treat every corridor junction as a decision point: confirm your objective direction, check the adjacent cover, and keep a retreat path before advancing deeper into the Bear Alpha area.
-
Primary objective: Identify where you must go and the simplest visible feature near it.
-
Threat entry point: Note the direction from which the Bear is most likely to approach.
-
Cover rhythm: Look for cover at regular intervals instead of one large exposed gap.
-
Exit branch: Keep one alternate escape direction that does not cross the objective.
-
Recovery point: Choose a location where you can pause and reassess without becoming trapped.
| Route pattern | Threat level | Survival recommendation |
|---|---|---|
| Direct objective line | High | Avoid unless every segment has usable cover |
| Alternating cover line | Low | Preferred for new survivor rounds |
| Long looping route | Medium | Use when the short route is exposed |
| Dead-end search | Very high | Do not enter unless the exit is certain |
| Retreat through the Bear’s area | Very high | Find an alternate branch instead |
Read a Map by Landmarks, Not Memorized Paths
New players often try to memorize every turn from a previous video. That approach becomes unreliable when objectives appear in different positions or another player takes the route first. Landmark Navigation is more transferable: identify a tall tree, a distinctive building, a path intersection, or a visible objective marker and use it as the anchor for your next movement.
The BEAR cheat sheet is useful for consolidating objective reminders and community terminology, but it should stay outside your active Landmark Navigation process. For example, use the cheat sheet to confirm an objective’s name or accepted terminology before the round, then rely on the visible path intersection, building, tree, or objective marker to choose your route. Keeping map recognition separate from reference material makes it easier to react to a teammate moving first or to an objective spawning in a different position, rather than forcing a memorized turn sequence onto a changed layout.
Count Risky Crossings
A crossing is any stretch where you cannot easily hide or turn back. Count these as you plan a route rather than judging the entire map by its size. Two short crossings may be safer than one long crossing because they give you more opportunities to stop, listen, and redirect.
| Crossing length | Exposure | Best response |
|---|---|---|
| Under a few steps | Low | Move quickly but check the landing point |
| Medium distance | Medium | Use cover and wait for the path to clear |
| Long open distance | High | Delay the crossing or choose another objective route |
| Unknown-length corridor | Uncertain | Test cautiously with a ready retreat |
This method also helps Bear players. A patrol that repeatedly checks exposed crossings is more effective than one that circles the map without a purpose. If the Bear hears a survivor commit to a long crossing, the pursuit can begin before the target reaches cover.
Bear Alpha Keyboard and Control Strategy
Controls affect difficulty because hesitation at a critical turn can be more dangerous than being slightly slower. Desktop players should learn a consistent movement pattern, while mobile players should reduce the distance required for frequent actions. The exact key layout may vary by device, so verify it in your current settings before a round.
The following Control Priority Checklist focuses on decisions rather than assuming one universal binding: assign each input a clear purpose based on its role during movement, threat detection, and objective completion. For example, prioritize route control when a bear blocks a corridor, use the flashlight only when visibility changes the outcome, and avoid menu access during an active encounter. This priority-based approach keeps slower inputs from becoming the deciding factor in a dangerous BEAR ALPHA encounter.
| Control action | Desktop priority | Mobile priority | Result |
|---|---|---|---|
| Move | Highest | Highest | Preserve route options |
| Look around | High | Medium | Detect threats before crossing |
| Interact | Medium | Medium | Complete the objective promptly |
| Flashlight use | Tactical | Tactical | Save it for useful visibility, not constant movement |
| Menu access | Low | Low | Avoid opening it during a round |
Use Short Burst Movement
Hold movement while crossing open space, then stop behind cover rather than continuously sprinting through the entire route. This reduces the chance of entering an unseen corridor at full speed and makes it easier to reverse direction if danger appears ahead.
On keyboard, practice alternating between movement and brief look checks. The goal is not to play more cautiously; it is to reduce wasted distance. A measured player who takes the right route can reach the objective faster than a nervous player who repeatedly stops in exposed positions.
Keep the Flashlight Tactical
A flashlight can reveal terrain and help you monitor a route, but using it constantly may make your position easier to interpret. Community reports emphasize Flashlight Discipline as a route-management skill: turn it on when it adds useful information, such as identifying a distant exit or checking an intersection, then switch it off when movement and sound are enough.
Do not treat every player video as permanent truth. For example, this BEARY SCARY update video can help you understand current community experiences with a specific update, but it does not establish an official difficulty standard. Check what changed before relying on an old route.
Adapt the Settings to Your Route
If you play on a small screen, reduce visual clutter and enlarge only the interface elements you need. If you play on a desktop keyboard, ensure that movement keys do not conflict with menu shortcuts. When your controls feel inconsistent, the BEAR settings guide can provide a focused place to organize the setup.
The key test is whether you can move, look, interact, and cancel an action without lifting your hands from a comfortable position. For example, keep movement keys held while checking an interactable, then cancel that interaction with a nearby key and immediately redirect your route. If a cramped map forces you to release movement, cross the mouse cursor, or use an awkward modifier combination, simplify the layout before increasing the difficulty; otherwise, control friction can look like a map challenge and cause avoidable deaths.
Bear Alpha Roadmap Guide: Progress From Easy to Hard
A beginner should not judge progress by surviving one lucky round. Track whether you can recognize objectives, choose safer routes, use cover, and leave before the map becomes crowded. Those skills transfer between maps and make later content more manageable.
The Four-Stage Learning Roadmap progresses from identifying the objective and exit to controlling routes, handling pressure, and hunting strategically. Each stage isolates a different skill, so a higher map tier is not simply a speed test: Stage 1 teaches objective recognition on a safest-tier map, Stage 2 requires cover use and rerouting on easy-tier maps, Stage 3 adds sound, sight, and time pressure on medium-tier maps, and Stage 4 rewards exit prediction on challenging-tier maps. The difficulty comes from applying each ability under changing conditions rather than memorizing one fixed route.
| Learning stage | Player focus | Success condition | Recommended map type |
|---|---|---|---|
| Stage 1: Recognition | Locate the objective and exit | Completes the round with a clear route | Safest-tier map |
| Stage 2: Route control | Use cover and avoid open crossings | Changes route when a path becomes blocked | Easy-tier map |
| Stage 3: Pressure handling | Respond to sound, sight, and time pressure | Escapes without relying on perfect routes | Medium-tier map |
| Stage 4: Strategic hunting | Cut off exits and predict survivor choices | Applies pressure without constant chasing | Challenging-tier map |
Master One Map Before Chasing Variety
Completing a round on one well-known map teaches more than several losses on unfamiliar ones. Focus on the objective, identify two viable exits, and note where your previous route became vulnerable. Once you can do that consistently, switch to a structurally different map. The BEAR returning-player guide is useful if you have played before but need to rebuild a consistent routine after a break. It can also help separate old assumptions from mechanics that may have changed.
Track the Parts You Missed
After each round, record one failure and one success. “The Bear came from the left” is useful only when paired with a correction, such as using the tree cluster before the left crossing next time. This turns each loss into a specific route adjustment rather than a vague feeling that the map was unfair.
| Observation | Likely route issue | Next-round adjustment |
|---|---|---|
| Spotted immediately after leaving cover | Exposed transition | Add another cover stop |
| Reached the objective too late | Long search pattern | Learn a landmark route |
| Blocked at the only exit | Single-route design | Prioritize maps with alternatives |
| Lost track of the Bear after turning | Weak information cues | Pause before committing to cover |
Use the Update Guide for Current Conditions
Map layouts, objectives, and temporary events may change during development. The BEAR update log helps separate documented changes from community assumptions. Treat older route advice as historical until you verify that the relevant feature still appears in the current version.
A related example is this Hollow event gameplay video, which shows community-tested conditions around that event. Because event rules can be temporary, use it to understand behavior rather than assuming the same threat pattern applies to every standard map.
Bear Alpha Update and Map Selection Checklist
Select a map by its immediate structure, not by its reputation. A recently updated map may introduce unfamiliar objectives, while an older map may remain easier because its routes and landmarks are familiar. There is no official numerical tier list available in the supplied community data, so transparent reasoning is more reliable than invented scores.
Before starting a BEAR Alpha round, quickly verify that the selected map’s spawn, exits, cover spacing, and current objectives still match your last test. A map can become harder after a BEAR Alpha update even if its layout is unchanged, because removed routes, altered objectives, or shifted cover can break practiced navigation; revisiting a recently tested map after major patches is therefore safer than assuming an older favorite remains efficient.
| Question | Good sign | Caution sign |
|---|---|---|
| Can you identify the objective from spawn? | Clear visible landmark | Only the minimap explains it |
| Does the route have alternate exits? | At least two branches | One narrow escape |
| Is cover spaced regularly? | Frequent usable shelter | Long featureless stretch |
| Do controls respond consistently? | Smooth movement and interaction | Frequent missed actions |
| Are current objectives familiar? | Recently tested | Removed or changed without review |
Revisit Your Choice After Updates
Keep a lightweight map record with three columns: safe route, dangerous route, and objective location. When an update changes an objective or closes a passage, update that note before your next match. This simple routine reduces the difference between a difficult map and an avoidable mistake.
The BEAR lobby and round guide can help with pre-round preparation, including checking which mode or event is selected. Confirm the activity first because an event may add conditions that make the usual route ranking unreliable.
Final Difficulty Decision
Choose the Safest Tier map if you need time to learn objectives. Select the Easy Tier when you understand the basic loop but still lose time on routes. Move to the Medium Tier only after practicing escape decisions and cover use; save the Challenging Tier for rounds where you can commit to a deliberate plan.
The best map is not always the one with the lowest reputation. It is the one where you can recognize the objective, identify a safe exit, and respond to danger without relying on luck. Apply that standard consistently, and your survival decisions will improve even as BEAR Alpha adds new maps, objectives, and updates.
Frequently Asked Questions
Which BEAR Alpha map is safest for a new player?
The safest choice is a short map with a visible objective, several exits, and regular cover. No official numerical tier list is available, so structure matters more than community reputation. Begin with a familiar low-branching environment, learn one reliable route, and move to more complex maps after completing rounds consistently.
Does an open map count as easier than a forest?
Sometimes, because open ground can expose both players and make movement easier to read. A field becomes dangerous when it is crossed without nearby refuge. Look for a middle-layer shelter that breaks sight and allows a quick redirect; otherwise, treat the open stretch as a high-exposure crossing.
Should new players use the flashlight continuously?
No. Constant flashlight use can make your location easier to interpret, although visibility may still help you check a distant exit. Turn it on only when it reveals useful terrain or route information, then conserve it when movement, sound, and landmarks provide enough guidance.
How do I know if a map changed in an update?
Compare the current objective, route openings, and event behavior with your previous notes, then consult the BEAR update guide for documented changes. Player videos can confirm what a community session looked like, but they do not necessarily define every version or permanent rule.
What is the best progression path in BEAR Alpha?
Master recognition, routing, and escape decisions on safe maps before entering higher-risk areas. Track where your route fails, practice an alternate exit, and enter the next difficulty band only when you can explain why you chose each path. This produces more reliable progress than repeatedly selecting unfamiliar maps.